How to use ChatGPT with your WordPress site.
ChatGPT cannot reach your WordPress site on its own. Add HexaHQ to ChatGPT and connect your site to it, and ChatGPT can write posts in your voice, save them to your site as drafts, and publish one only after you approve it.
What you need.
- A paid ChatGPT plan: Go, Plus or Pro.
- A free HexaHQ account.
- The username you sign in to your WordPress site with, as an administrator or editor. Your site can be hosted anywhere.
Is your site hosted on WordPress.com?
Most WordPress sites are not, and this guide is for them. If yours is on WordPress.com, WordPress.com has its own ChatGPT plugin, built on what it calls its MCP server, on every paid WordPress.com plan. Follow WordPress.com’s guide to editing your site with ChatGPT. The same is open to a site you host yourself if it is connected through Jetpack on a Jetpack AI or Jetpack Complete plan.
Source: WordPress.com Support, Edit your WordPress.com site with ChatGPT, checked 24 September 2026.
StepsAdd HexaHQ to ChatGPT.
- Add the HexaHQ connector to ChatGPT. Adding HexaHQ to ChatGPT shows every screen. Come back here once ChatGPT has signed you in to HexaHQ.
-
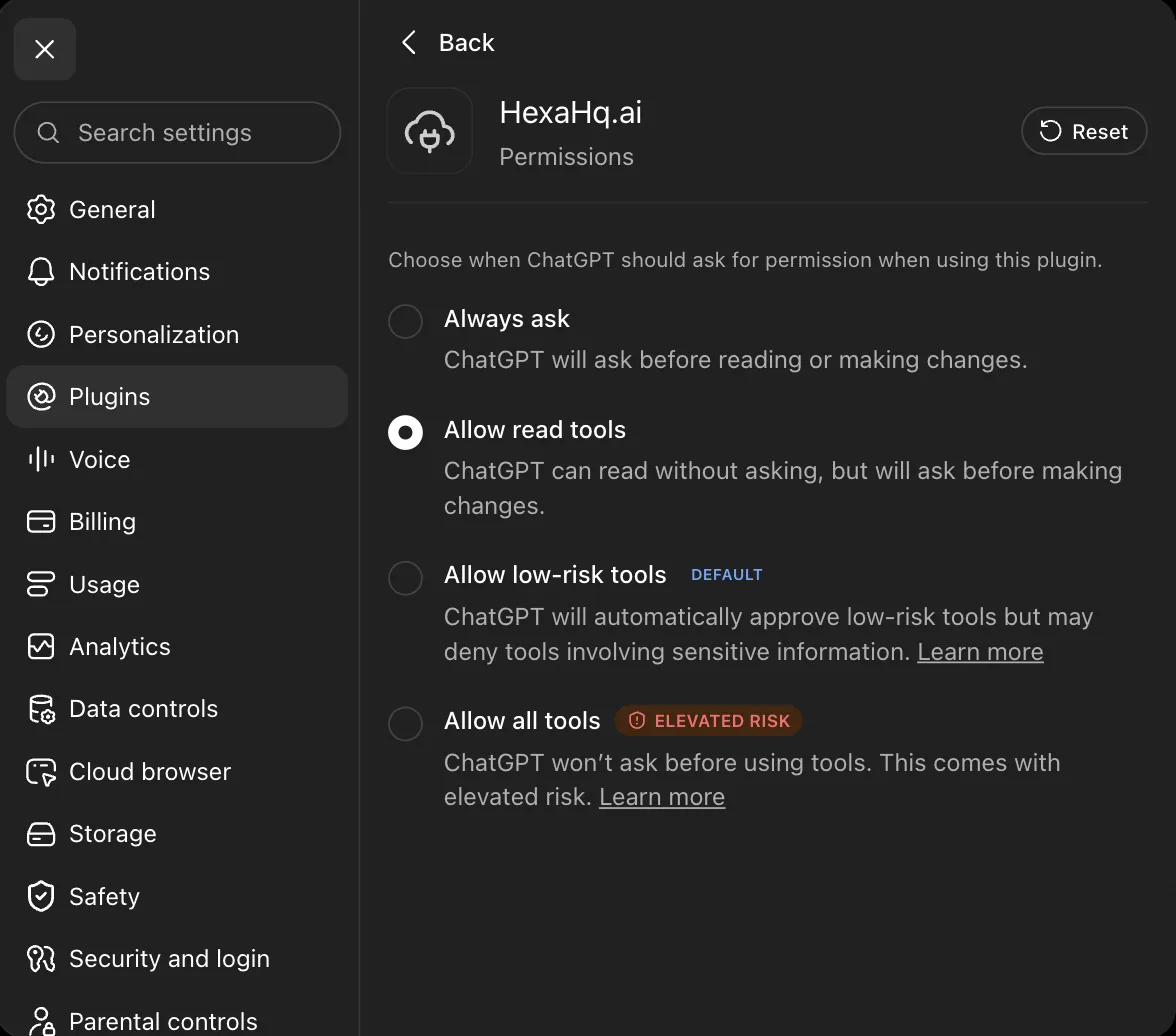
Open the HexaHQ plugin’s permissions and choose Allow read tools. On the Plugins
page, open HexaHQ, then the ··· menu, then Manage. With Allow read tools, ChatGPT
looks things up without interrupting you and asks before it changes anything on your site.
Connect your WordPress site.
-
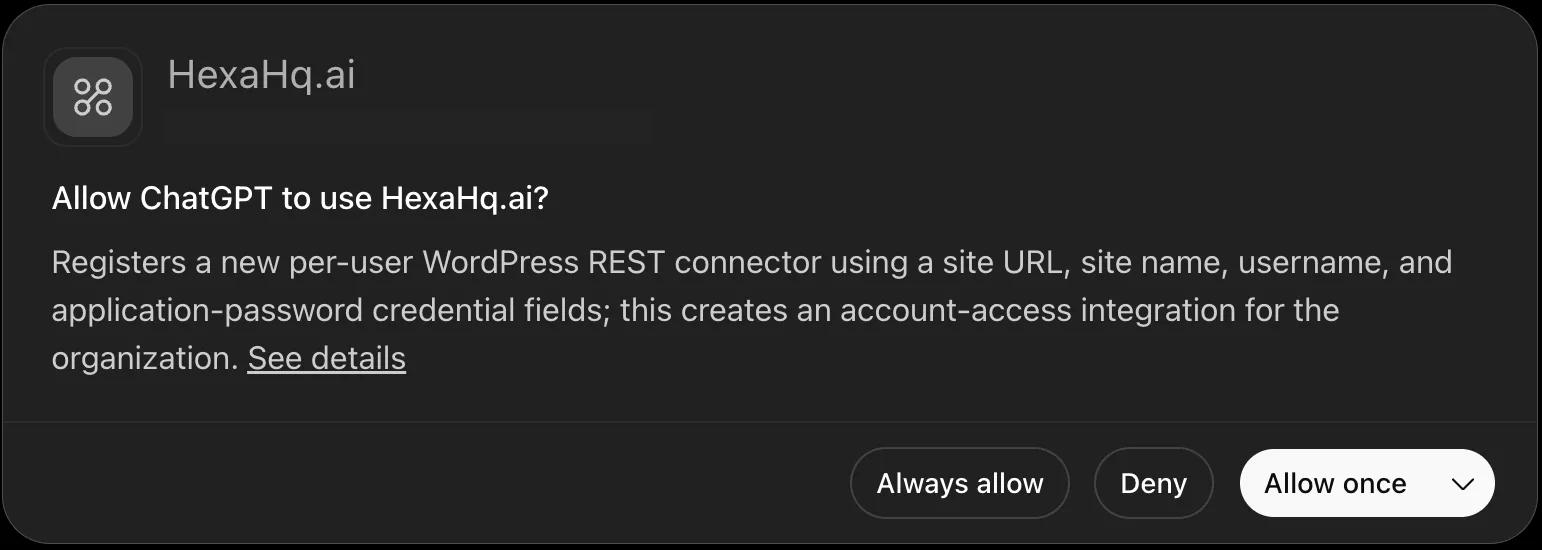
Ask ChatGPT to connect your WordPress site, and give it your site’s address. The
first time, ChatGPT asks your permission to set HexaHQ up for WordPress sites. The wording is technical;
it means HexaHQ is adding WordPress to the things it can connect to for you. Click
Allow once.
-
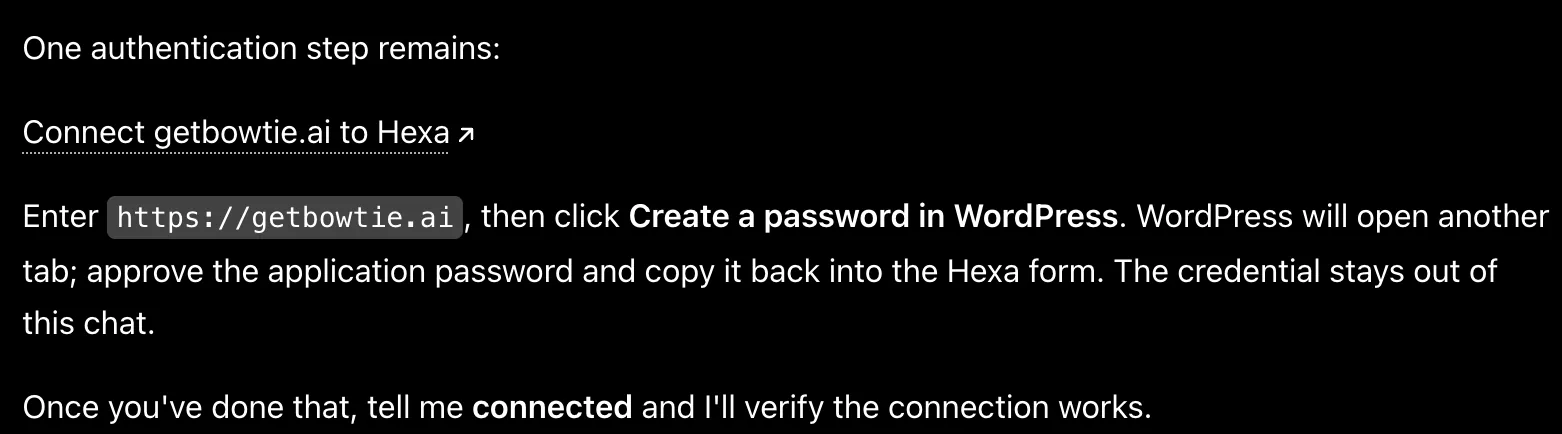
Open the link ChatGPT gives you. It also tells you what to do on the page it opens, which
is the next three steps.
-
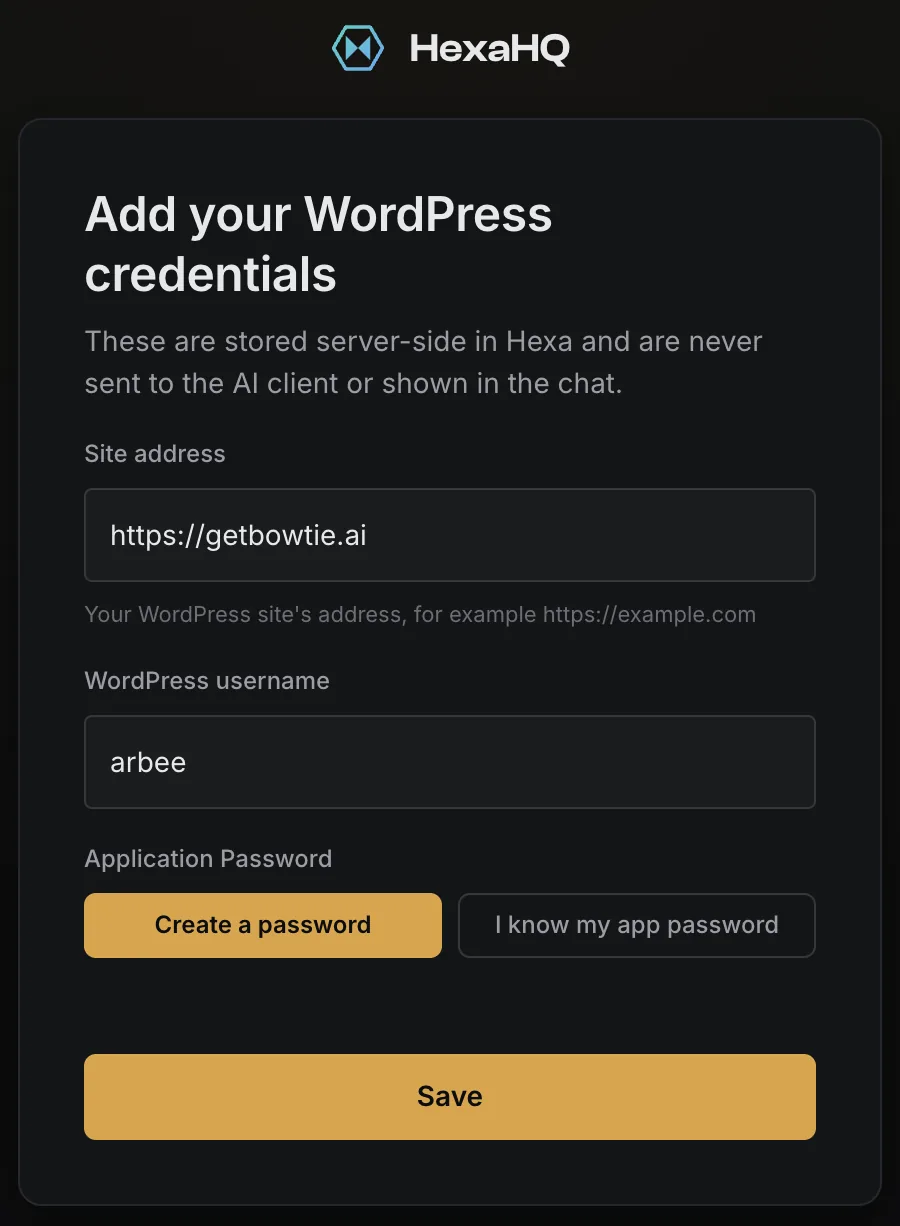
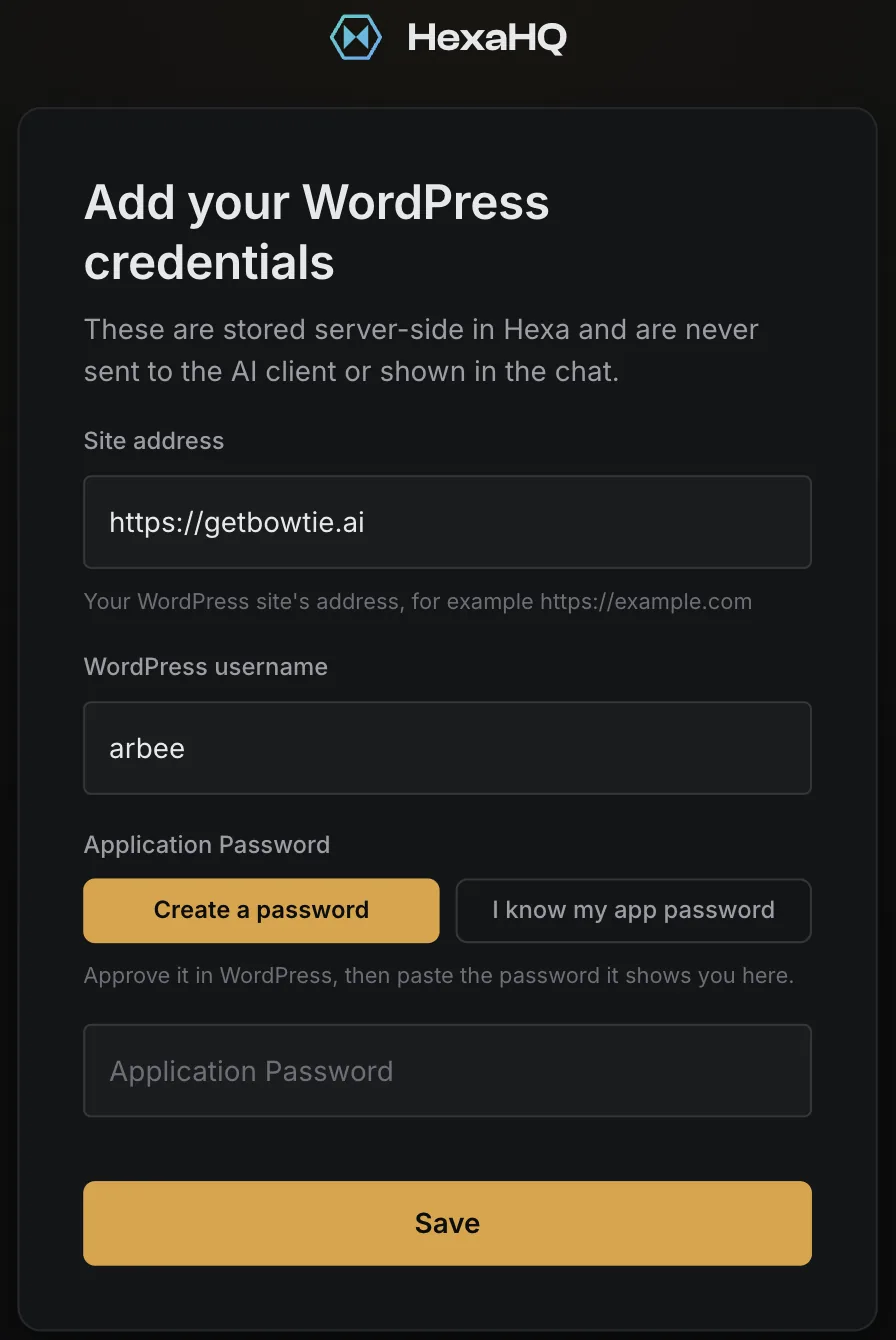
Type your site address and WordPress username, and click Create a password. You do not
need a password of your own: WordPress makes one just for HexaHQ, in a second tab. Keep this tab open; you
will come back to it.
-
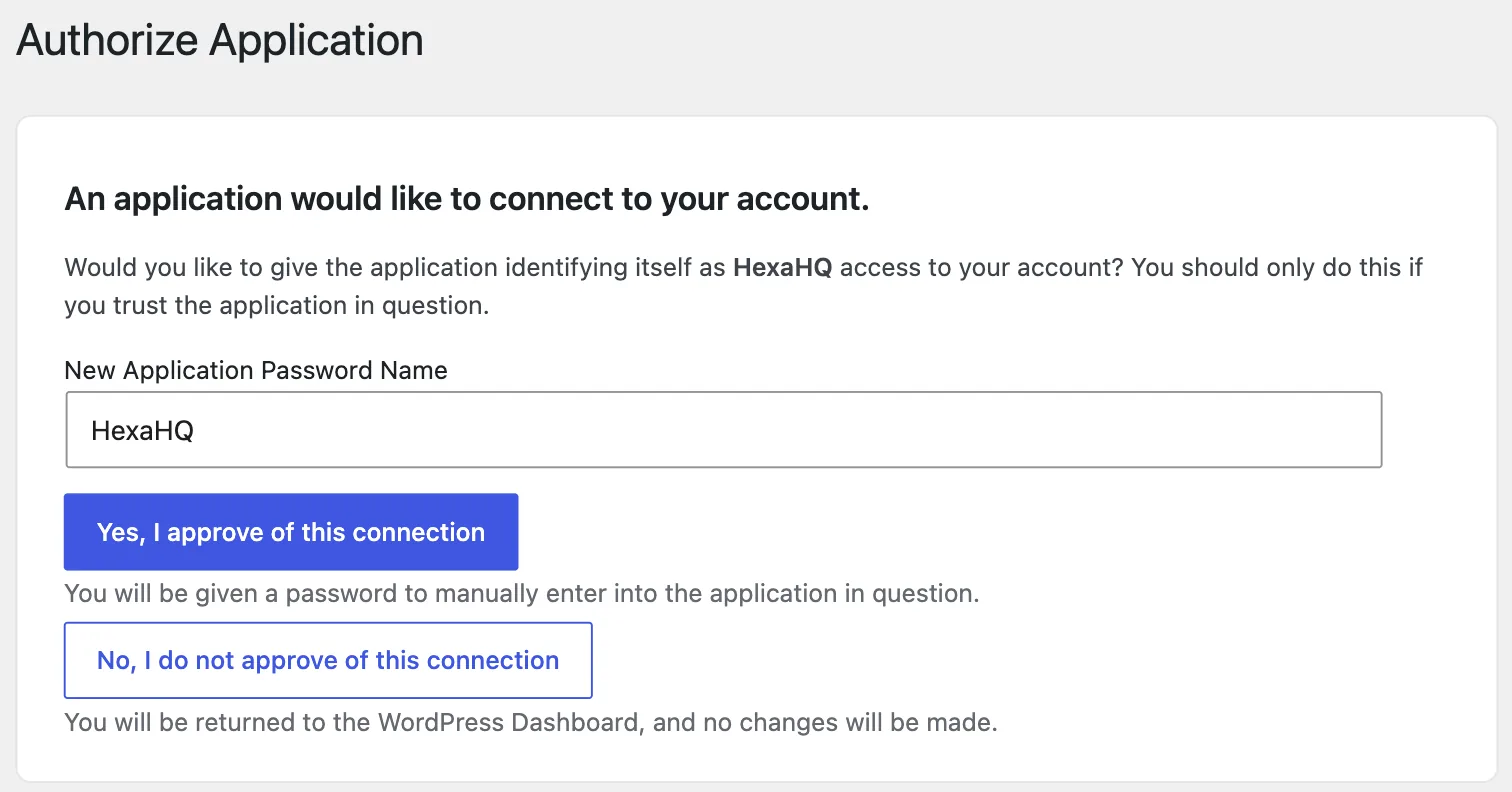
Approve the connection on your WordPress site. WordPress opens its own page asking
whether HexaHQ may connect to your account. Click Yes, I approve of this connection. If
WordPress asks you to log in first, log in and you will land on this page.
-
Copy the password WordPress shows, paste it into the HexaHQ form in your first tab, and click
Save.
Copying it by hand is deliberate: it keeps the password out of web addresses, where it could be recorded.
It never appears in your chat, and ChatGPT never sees it. Once you see Saved, go back to ChatGPT.
Write your first post.
-
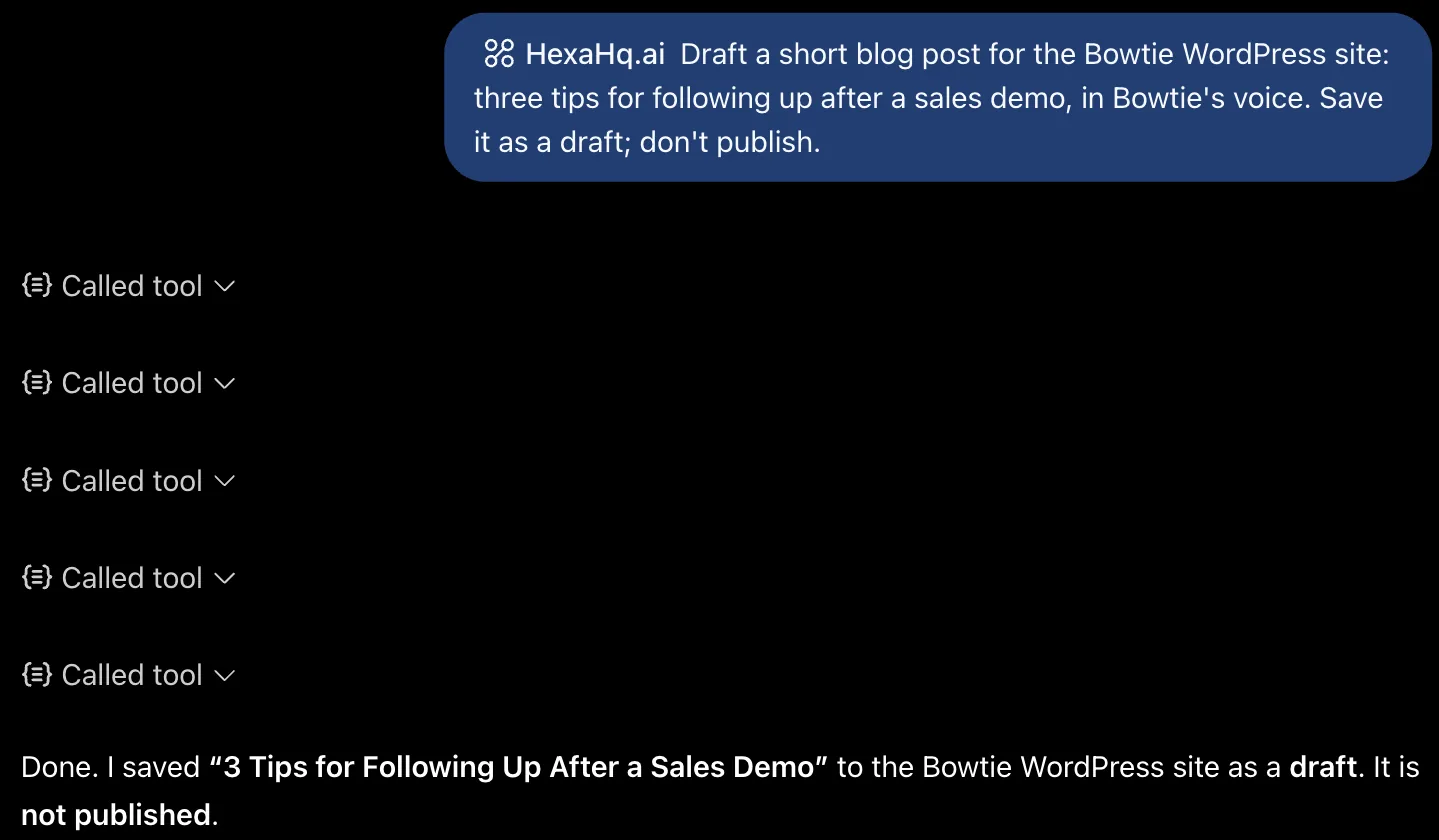
Start a new chat, choose HexaHQ from the plus menu, and ask for a post. Say what it is
about and that it should be saved as a draft. ChatGPT writes it and saves it to your site without asking,
because a draft changes nothing a visitor can see.
-
Read the draft in WordPress. It is under Posts, in Drafts, and you can edit it there like
any other post.

-
When you are happy with it, ask ChatGPT to publish it. Publishing is the change a visitor
sees, so ChatGPT stops and asks you first, saying what it is about to do. Click
Allow once to publish, or Deny to leave it as a draft.
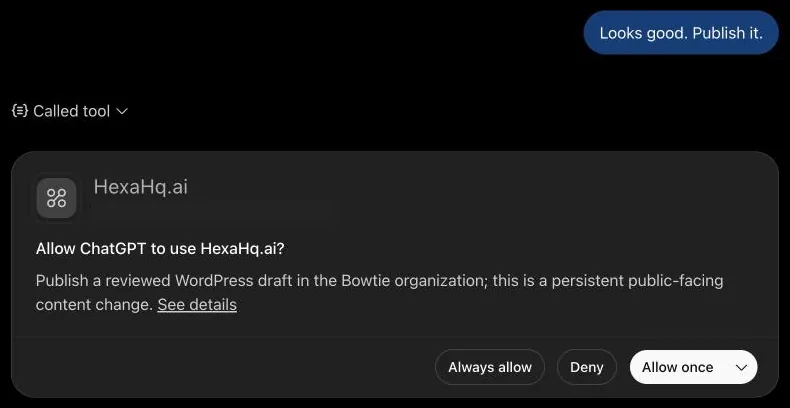
Choose Allow once, not Always allow. Always allow tells ChatGPT to stop asking you before changes like this one.
Your voice, and your say.
Tell HexaHQ once how your company writes, and every post ChatGPT drafts for your site starts from it, including in chats you open next month. Drafts are saved without asking, because a draft is only for you. Publishing waits for you, every time. And everything ChatGPT did on your site is listed in HexaHQ’s activity log, with WordPress’s own revision history on each post behind it.
Related helpRelated help.
- Add HexaHQ to ChatGPT, every screen of step 1.
- Refresh the HexaHQ connector in ChatGPT, for when ChatGPT says HexaHQ’s tools are out of date.
- Use Claude with your WordPress site.
- Connectors and capabilities: what HexaHQ set up for your site when you connected it.
- The activity log: everything ChatGPT did through HexaHQ.