Add HexaHQ to ChatGPT.
HexaHQ works through the AI you already use, so the first thing to do is add its connector. In ChatGPT that takes two screens: Developer mode goes on under Security and login inside Settings, then you leave Settings and create the plugin from the Plugins page.
What ChatGPT needs.
The address is https://mcp.hexahq.ai/mcp, and authentication is OAuth, so you approve access in
the browser rather than pasting any secret into ChatGPT. ChatGPT also needs developer mode switched on
first; that setting is on the Security and login screen, and it is step 3 below.
Switching developer mode on.
-
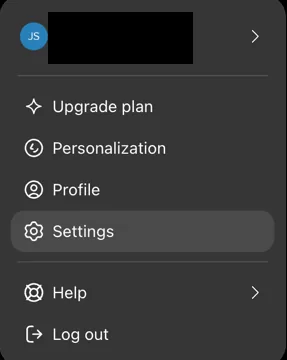
Open your account menu, then Settings.
-
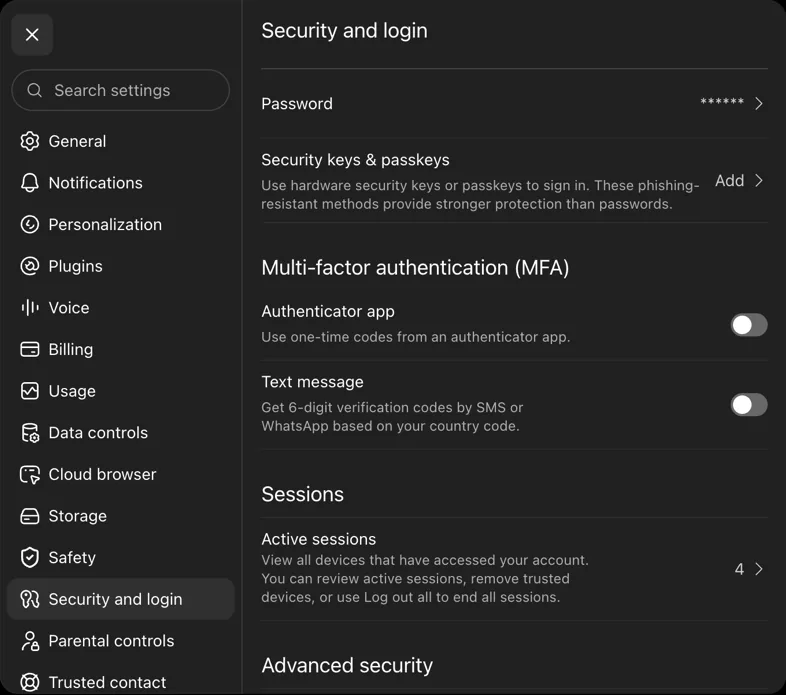
Choose Security and login. The Developer mode switch is on this screen, not on the
Plugins screen.
-
Scroll past Lockdown mode and switch on Developer mode. Leave “Enforce CSP in
developer mode” as you found it; it is unrelated to adding a connector.
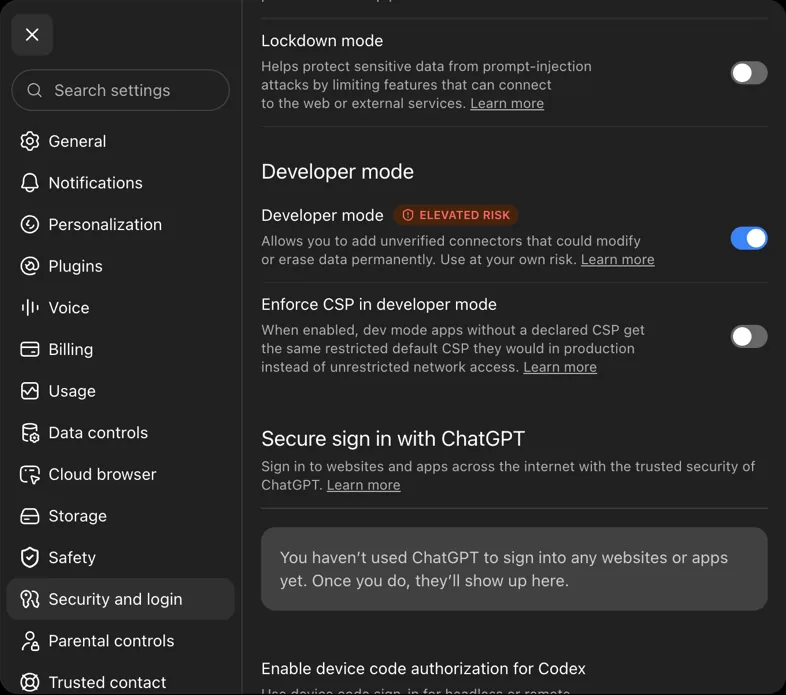
The ELEVATED RISK badge is about the plugin store, not about HexaHQ. Developer mode is what lets ChatGPT add a connector that is not in OpenAI’s plugin store, and HexaHQ is not in that store yet. The badge says the same thing for HexaHQ as it does for every connector added this way, and it stays until HexaHQ is published there. What HexaHQ does with the access is on the security page; it holds credentials server-side rather than handing them to the model, acts as you rather than as a shared account, and records every action in the run history for you to inspect.
StepsCreating the plugin.
-
Close Settings, then click Plugins in the main sidebar, or go straight to
chatgpt.com/plugins. Settings has a Plugins section of its own, but that one only lists what you have already installed. The one you want is in the main sidebar.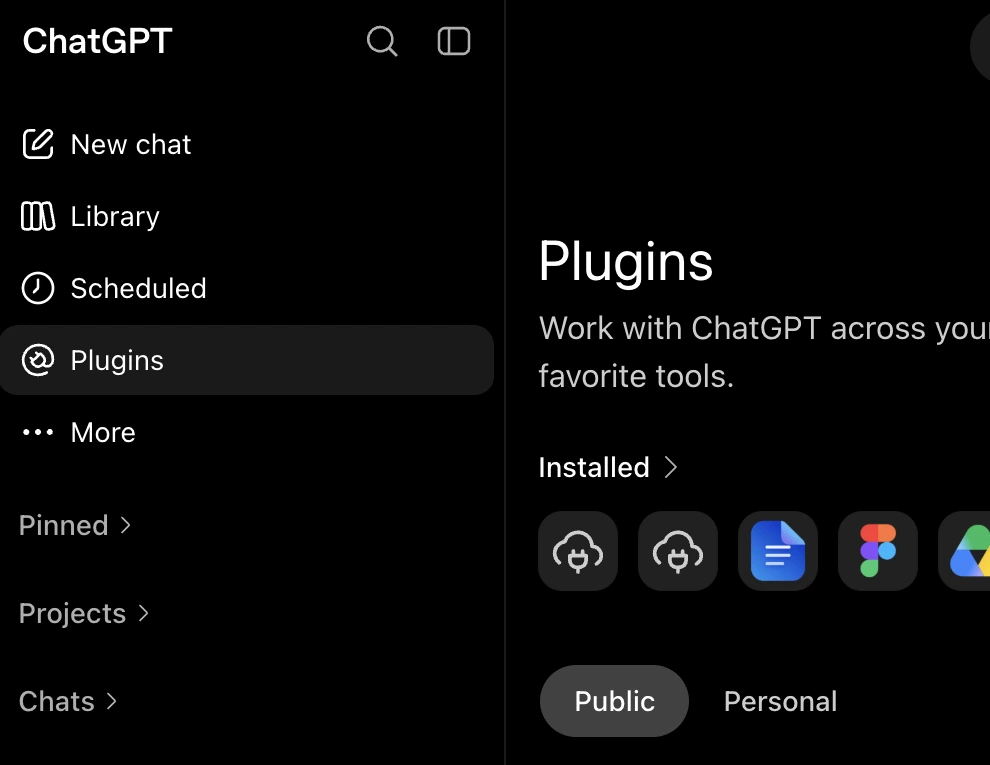
-
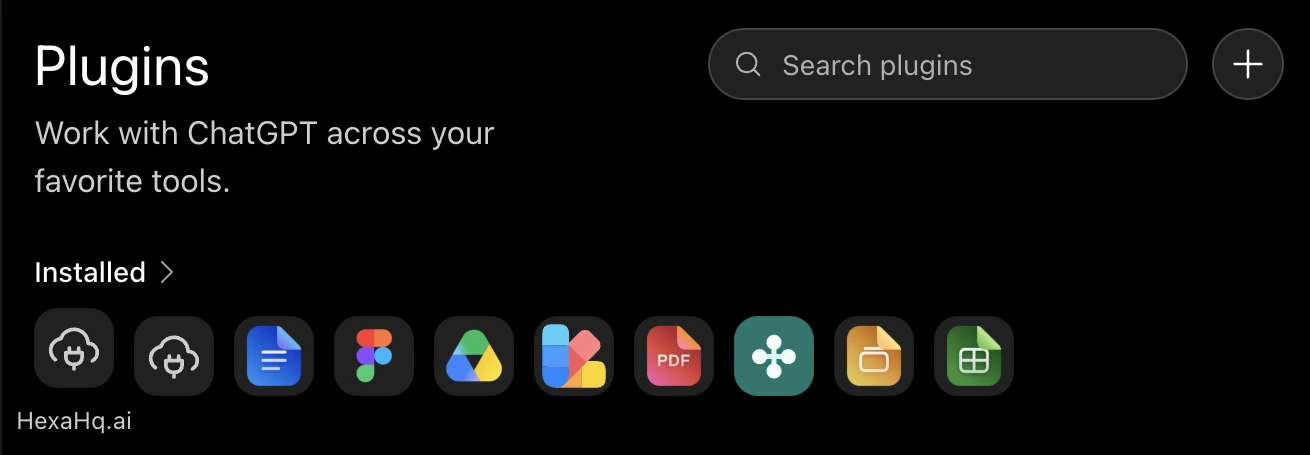
Click the plus at the top right of the Plugins page. It sits beside the search box, above
the installed plugins.
-
Name it, paste
https://mcp.hexahq.ai/mcp, and leave Authentication on OAuth. The name is only the label you will see in your own list. Leave Connection on Server URL rather than Tunnel, and leave Advanced OAuth settings alone: it fills itself in from the address. The example shown in the field ends in/sse, but HexaHQ's ends in/mcp, so paste rather than pattern-match.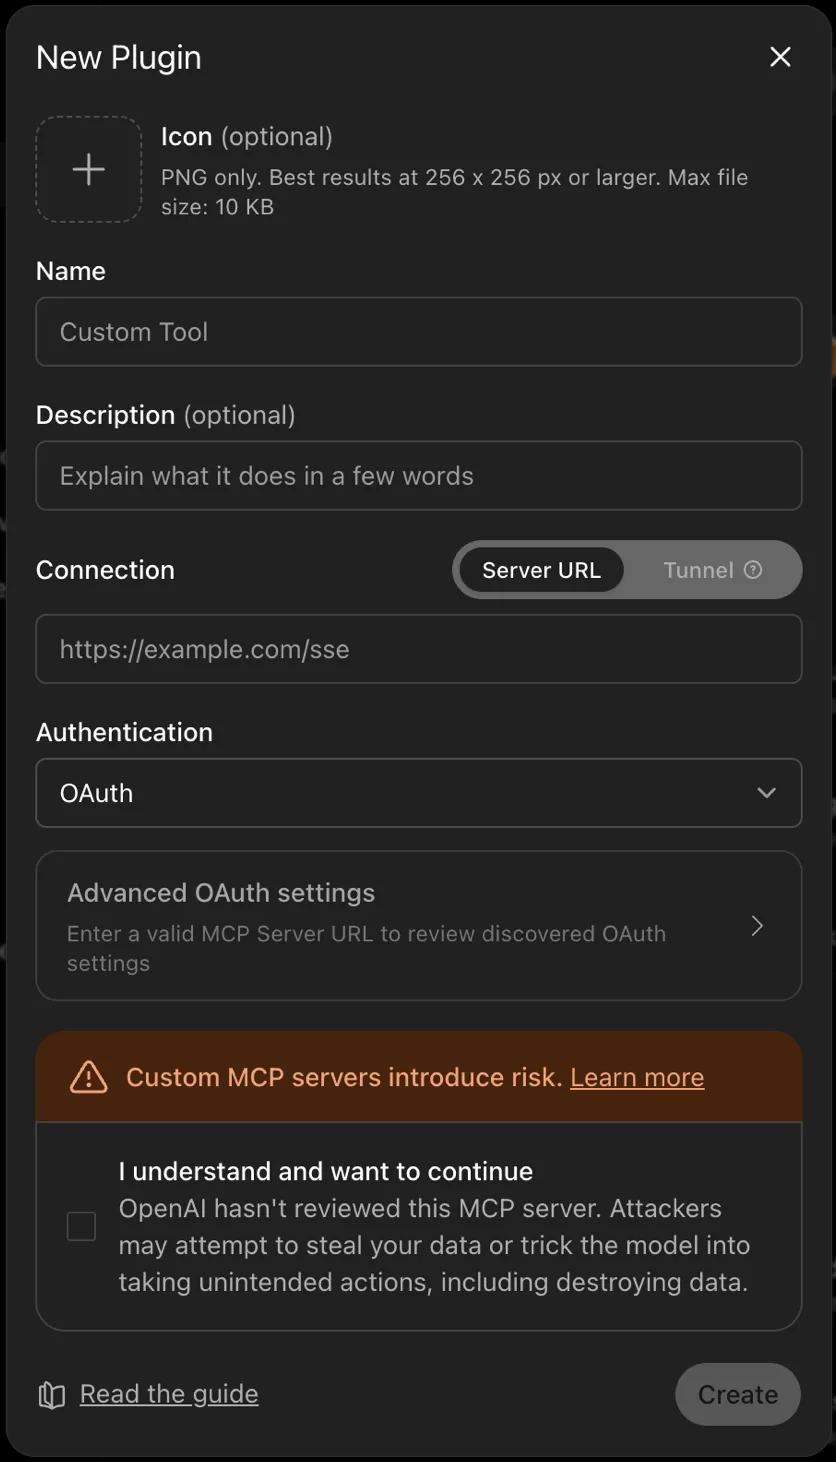
Create stays greyed out until you tick “I understand and want to continue”. Nothing on the dialog says that is why, so a disabled Create button reads as the address having been rejected, and the usual next move is to start editing a field that was already correct. Tick the box, then Create.
- Sign in to HexaHQ when ChatGPT asks. That is where the connection is authorized, in the browser, and it is the point at which HexaHQ knows who you are.
Once it is connected.
Ask ChatGPT for something that touches your tools and it will reach for HexaHQ. One thing worth knowing early, because it is the commonest confusion afterwards: ChatGPT holds on to its copy of what HexaHQ can do, so when HexaHQ changes you have to refresh the plugin and start a new chat. Refreshing the connector in ChatGPT covers that, including the control that looks right and is not. If you use Claude as well, adding it there is a shorter and different procedure.
For a first thing to try, using ChatGPT with your WordPress site goes from connecting the site to a draft post, and shows the approval ChatGPT asks for before it publishes.